These days, sharing your location is just part of living in a world where convenience and connectivity are essential. This is especially true for iPhone users, for whom using Google Maps’ features lends an additional level of usefulness. Using Google Maps on your iPhone to share your current location is a simple process that this guide will show you how to do.
Why Share Your Location on Google Maps:
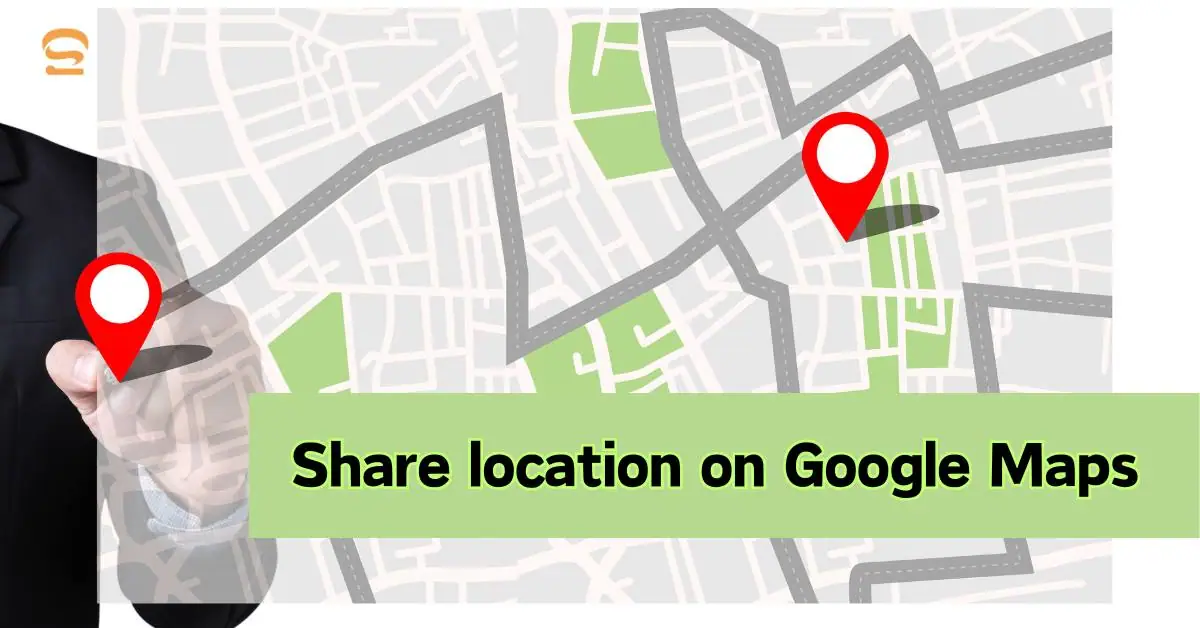
Imagine scenarios where sharing your location proves invaluable – coordinating meetups, ensuring the safety of loved ones, or merely giving directions to friends. Google Maps, a multifaceted navigation tool, takes this experience a step further, making it not just about sharing locations but ensuring a comprehensive and user-friendly interaction.
Step-by-Step Guide: How to Share Location on Google Maps (iPhone):
1. Opening the Google Maps App and Signing In:
- Ensure you have the Google Maps app installed on your iPhone.
- Sign in to your Google account within the app for personalized features.
2. Accessing the Location Sharing Feature:
- Locate your profile picture or initial icon within the app interface.
- Explore the “Location sharing” option, understanding its functionality.
3. Selecting Sharing Duration:
- Choose the duration for which you want to share your location.
- Understand the various sharing duration options available.
4. Choosing the Recipient:
- Select the contact or individual with whom you want to share your location.
- Explore the option to share with multiple contacts simultaneously.
5. Initiating Location Sharing:
- Tap the “Share” button to commence sharing your real-time location.
- Grant access to contacts if prompted for a seamless experience.
6. Verifying Location Sharing Status:
- Confirm that your location sharing is active and functioning properly.
- Learn how to view the ongoing location-sharing session for reassurance.
Privacy and Security Considerations:
Google Maps prioritizes your privacy. Learn about the app’s privacy features, emphasizing the control you have throughout shared location and encouraging mindfulness about privacy settings.
Troubleshooting Tips:
Even the most intuitive apps can sometimes encounter hiccups. This section provides insights into common issues and offers practical solutions. Additional resources are included for more extensive troubleshooting.
How to Save Google Maps Offline on Your iPhone
Hello, fellow travelers! 🌍 If you’re like me, you probably rely heavily on Google Maps to navigate your way around new cities or even just to find the quickest route to your local grocery store. But what happens when you’re traveling to a place with limited internet connectivity? Or maybe you’re just trying to save on data usage? Don’t worry, Google Maps has got you covered with its handy offline maps feature. Here’s a step-by-step guide on how to save Google Maps offline on your iPhone:
Step 1: Open Google Maps
Start by launching the Google Maps app on your iPhone. Make sure you’re signed in to your Google account.
Step 2: Go to Offline Maps
Tap on your profile picture located at the top right corner of the screen. A menu will appear. Select ‘Offline Maps’ from the list.
Step 3: Select Your Own Map
You’ll see a list of your offline maps if you have any. To create a new one, tap ‘Select your own map’. This will allow you to choose the specific area that you want to save for offline use.
Step 4: Adjust the Map
Now comes the fun part! You can pinch and zoom the area to fine-tune what you’d like to save. Make sure the area you want is within the blue box. The app will also show you how much storage space the offline map will use on your device.
Step 5: Download the Map
Once you’re happy with the selected area, tap ‘Download’. Your desired area will now be downloaded and can be accessed offline.
And voila! You now have a handy offline map ready for your next adventure. Remember, you’re unable to download offline maps in some countries or regions due to contractual limitations, language support, address formats, or other reasons. So, make sure to check if the feature is available in your region. Safe travels! 🚗💨
How to Change the Voice on Google Maps on Your iPhone
Hello, tech enthusiasts! 📱 Today, we’re going to talk about a feature on Google Maps that you might not be aware of – changing the voice for navigation. Yes, you heard it right! You can actually change the voice that guides you on your journeys. So, let’s dive right in and learn how to change the voice on Google Maps on your iPhone.
Step 1: Open Google Maps
First things first, open the Google Maps app on your iPhone. Make sure you’re signed in to your Google account.
Step 2: Access the Settings
Tap on your profile picture located at the top right corner of the screen. A menu will appear. From this menu, select ‘Settings’.
Step 3: Navigate to Navigation Settings
In the Settings menu, scroll down until you find the ‘Navigation Settings’ option. Tap on it to enter the menu.
Step 4: Select Voice Selection
Under the ‘Sound & voice’ section, you’ll find the ‘Voice Selection’ option. Tap on it to see a list of available voices.
Step 5: Choose Your Preferred Voice
Now, you’ll see a list of available voices. These are separated by language or, in some cases, by regions. For instance, both the ‘English US’ and ‘English UK’ voice settings will speak in English but will use different accents and terminology. Select one of these options to switch the Google Maps voice to that setting.
And there you have it! You’ve successfully changed the voice on Google Maps on your iPhone. The next time you use Google Maps for navigation, the voice will match the one you’ve selected.
Please note that Google Maps and Google Assistant are separate entities. While Google Assistant has garnered attention for updated voices and celebrity voice additions, Google Maps does not currently allow for voice options outside of those located in the process outlined here.
So, go ahead and give it a try. Who knows, you might find a new favorite voice for your journeys! Safe travels! 🚗💨
As we wrap up this guide, reflect on the benefits of sharing your location on Google Maps. Beyond the convenience, it’s a tool that enhances our daily interactions. Embrace this feature, explore its nuances, and share the knowledge with your circle. In a world where distance is often just a number, sharing your location on Google Maps brings us closer together.
How to Get Walking Directions on Google Maps
Hello, fellow walkers! 🚶♀️🚶♂️ Whether you’re exploring a new city or trying to find the quickest route to your local park, Google Maps is a fantastic tool to guide you. But did you know that Google Maps can also provide walking directions? Yes, it’s true! Here’s a friendly guide on how to get walking directions on Google Maps:
Step 1: Launch Google Maps
Start by opening the Google Maps app on your phone. If you’re using a desktop, you can visit Google Maps and enter your origin and destination.
Step 2: Enter Your Destination
On the map, enter the destination you want to reach or simply tap it on the map. If you’re using a desktop, you can enter your origin and destination in the search bar.
Step 3: Tap Directions
Once you’ve entered your destination, tap ‘Directions’ in the lower left corner. If you’re using a desktop, you’ll find the ‘Directions’ button next to the search bar.
Step 4: Select the Walk Icon
Now, click on the ‘Walk’ icon. This will change your directions to walking directions. The icon looks like a little pedestrian and is usually the second option next to the car icon.
Step 5: Start Navigation
If you’re happy with the route, tap ‘Start’ to begin the navigation. If you’re using a desktop, you can follow the route on your screen.
And there you have it! You’ve successfully obtained walking directions on Google Maps. So, the next time you’re planning a walk, remember that Google Maps is here to guide you. Happy walking! 🚶♀️🚶♂️
Frequently Asked Questions about Share Location on Google Maps
-
Why is location sharing not working on Google Maps iPhone?
There could be several reasons why location sharing is not working on Google Maps on your iPhone. One common issue could be that the location service is not turned on. To check this, go to Settings > Privacy & Security, and tap on Location Services. Make sure to toggle on Location Services. Then tap on Google Maps, and select Always to allow location access. Another reason could be that your phone’s battery-saver mode is enabled. When you enable battery saver mode, your phone limits certain background activities, such as location tracking. As a result, apps like Google Maps may have trouble sharing or updating the shared location on your phone.
-
How do I send my location to someone?
You can share your location with others using various apps. For instance, in Google Maps, you can tap your profile picture, then tap Location Sharing. You’ll see this in the third grouping of menu options under “Your Timeline.” Then you can choose a duration to share your location and select a person you want to share your location with.
-
How do I share my location with family on Find My iPhone?
To share your location with family members on Find My iPhone, go to Settings on your iPhone or iPad. Tap your name, then tap Family Sharing. Tap Location Sharing, then tap Share My Location. Under Share Your Location With, tap to choose which family members to share your location with. If you haven’t set up Family Sharing yet, you can open the Find My app, tap or click the People tab, select a family member’s name, then select it again to see the menu. Tap or click Share My Location.